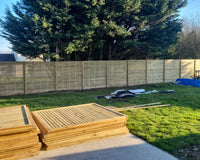
As the (hopefully) vibrant summer season approaches, it's the perfect time to enhance your outdoor space with a sturdy and stylish wooden garden gate. Not only does a well-built gate provide privacy and security, but it also adds a touch of charm to your garden or backyard. In this guide, we'll walk you through the process of constructing a strong wooden gate that will withstand the test of time.
Reasons to Choose a Wooden Garden Gate
- Privacy: A wooden garden gate acts as a physical barrier, limiting visibility into your outdoor space and providing you with a secluded area to enjoy some peaceful moments with your family and friends.
- Security: A well-constructed wooden gate adds an extra layer of security to your property. It discourages unauthorised access and helps keep pets and children safely contained within the boundaries of your garden.
- Aesthetics: Wooden garden gates exude natural beauty and blend seamlessly with various garden styles. They add a warm and inviting touch, enhancing the overall appeal of your outdoor area.
Building a Sturdy Wooden Garden Gate That Won’t Sag
Measure and Plan
Start by measuring the width of the gate opening and determining the desired height for your gate. Consider factors like ease of access, privacy requirements, and local regulations. Sketch out a plan, noting the dimensions and design details.
Gather the Materials and Tools
To build a strong wooden garden gate, you’ll need the following materials:
- Pressure-treated wooden boards for the frame and vertical slats
- Galvanised screws or nails
- Gate hinges and latch
- Reinforcing steel bars (optional)
- Postmix
- Post hole digger
As for the tools, make sure you have the following:
- Circular saw or hand saw
- Power drill or screwdriver
- Measuring tape
- Carpenter's square
- Level
- Chisel
- Hammer
- Safety gear (goggles, gloves, etc.)
Prepare the Gate Posts
Dig holes for the gate posts at least 1/3 of the total height of the gate and a minimum of 2 feet deep. Place the gate posts in the holes and fill them with concrete mix, ensuring the posts are level and plumb. Allow the concrete to cure as per the manufacturer's instructions.
Build the Gate Frame
Cut the wooden boards to the desired length for the horizontal rails and vertical stiles. Construct the gate frame by attaching the rails between the stiles using galvanised screws or nails. Ensure the frame is square by measuring diagonally from corner to corner.
Add the Vertical Slats
Measure and cut the vertical slats to the desired height for your gate. Position them evenly within the frame and attach them securely using screws or nails. Leave a small gap between the slats for air circulation and aesthetic purposes.
Reinforce if Necessary
Consider installing reinforcing steel bars diagonally across the back of the gate for added strength. Attach them securely to the frame using screws or nails. This step is particularly beneficial for wider gates.
Install Hinges and Latch
Attach the gate hinges to the gate frame and then mount them onto the gateposts. Make sure the hinges are properly aligned and allow the gate to swing freely. Install the latch on the opposite side of the gate, ensuring it securely holds the gate closed.
Finishing Touches
Sand any rough edges or splinters on the gate. Apply a weather-resistant sealant, stain, or paint to protect the wood from the elements and enhance its durability and appearance. Follow the manufacturer's instructions for application and drying times.
A well-designed gate adds functionality and contributes to the aesthetic appeal of your garden or backyard. Enjoy the upcoming summer season with peace of mind, knowing that your garden, children and pets are protected with a strong wooden gate.
Discover our range of strong and sturdy garden fencing materials, from fence panels to feather edge boards.


